
Make a Macramé Keychain

Earlier this year we hosted a macramé keychain event at Johnny Was in the Upper East Side for their anniversary party and it was a ton of fun!
We wanted to share our super simple patterns for cute macramé keychains.
You can do a variety of styles with just a few materials and 8 yards of macramé cord.
These make great gifts and are easy enough to do in a short period of time! Plus, you may have leftover craft material to repurpose into a cute keychain. Try using different materials, beads, and other found objects!
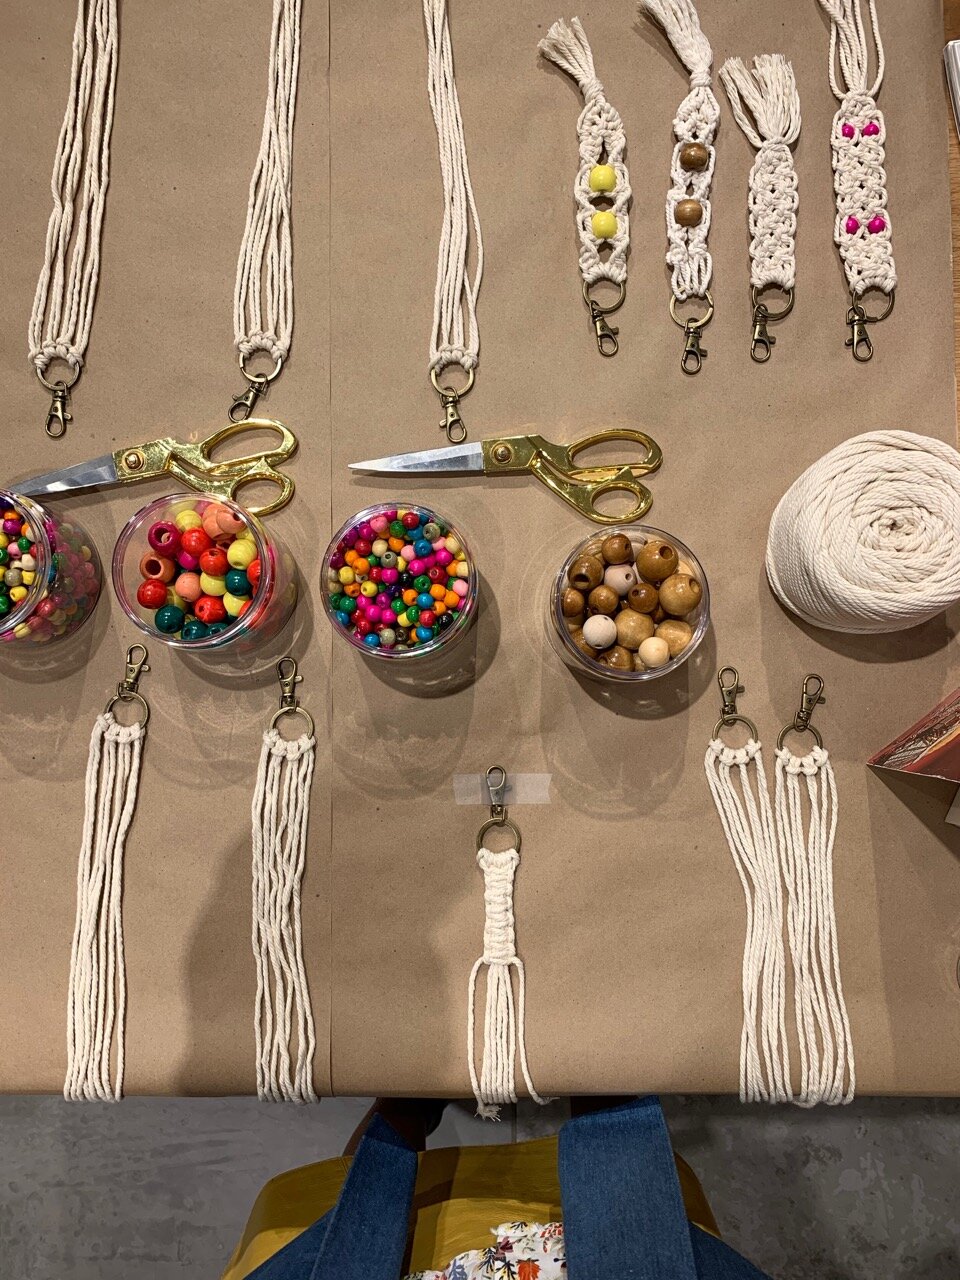
Materials:
8 yards 3mm cotton cord — we used this 3mm macramé cord
keychain hardware — we used these lobster clasp claws in bronze
wooden beads — we used these small assorted wooden beads
Instructions:
Cut out 4 pieces of 2 yards of the cotton cord
Download our macramé knot guide here.
Attach each piece of cotton cord via a lark’s head knot to the keychain. Make sure all ends are even.
Now, choose one of the following knots to use:
Square Knot
Twisting Half Square Knot
Use your chosen knot to create your keychain.
You can either do use two outside pieces of cord over all the other cords as filler cords, or split the cords in half down the middle and do two groups of four and then combined them.
Add beads as you go!
To add a bead, tape the end of the cord and push through the bead. Do a knot afterward to secure bead.
Here are some examples:

Macramé Keychain Examples
Left to right macramé keychain examples:
1. Uses alternating square knots — start with the left four cords and create one square knot, then do a square knot with the right four cords, then do a square knot with the middle four cords. Repeat until you want to add a bead. End with a square knot around all the other cords
2. Uses right and left twisting half square knots. Start with the left four cords and do twisting half square knots always starting with the right cord. Then use the remaining four cords and do a twisting half square knots always starting with the left cord. When you want to add a bead, add a larger bead and put one cord from either side through the bead to bring both sides together. Or, use two smaller beads. Continue with two halves of twisting half square knots. Finish with a wrap knot.
3. Same as #2.
4. Uses alternating square knots — start with the left four cords and create one square knot, then do a square knot with the right four cords, then do a square knot with the middle four cords. End with a square knot around all the other cords
5. Uses square knots using one cord form either side of the cords as the working cords (to create the knot) and all the rest of the cords as filler cords.
6. & 7. Uses square knots and then diagonal clove hitch knots to create a shape (in this case the letter C). Learn how to make a clove hitch knot here. Finish with a wrap knot.
Want to learn how to make a macramé plant hanger? Take our online macramé plant hanger course here. If you want to create with your friends, book a private macramé party.